One last relief
“We shall greet the morning… together.”
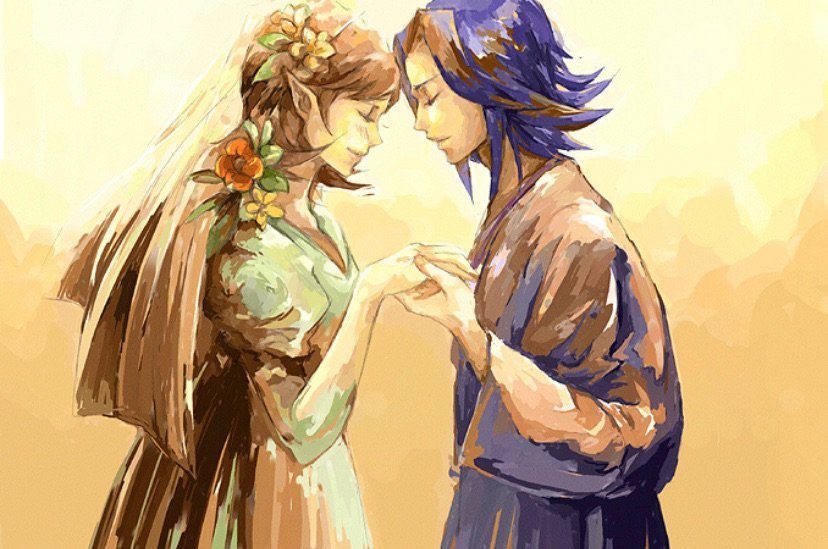
The catharsis of finally seeing Anju and Kafei embrace each other at the very last minute before the end of the world. This is truly pure, distilled, love folks..ahh…But this is no time to get sentimental; for starters, we don’t even really know whether the theme that accompanies this scene was originally composed for the sibling love of Tatl and Tael and then simply reused for the culmination of the Kafei side quest—it’s even likely seeing how that is part of the main quest and the soundtrack version name of the tune is ‘Tatl & Tael’, the way the music mimics a sense of flying, like the flutter of wings associated with the harp, also gives us a clue in this direction.
But in the end it is still all about relationships and reunions so it’s a fitting theme for both occasions. Whatever the case, it is great to see Koji composing a true unapologetically, unambiguous love theme full of truly good happiness; well, it also has some sad and sacred undertones, but they only enhance how sublime such a moment would be. A classic “end credits nostalgia tune” that is practically a trademark of Koji Kondo.
The sense of release is not only for the touching moment but also for how long, difficult and involved was the whole quest to reunite these two. It spans the entire three day cycle right to the very last minute and any mistake on the multiple events can cost the entire enterprise. You can start it almost at the very beginning of the game (Kafei is one of the first characters to appear on screen; we have been seeing him delivering mail at the beginning of each cycle). But it is only after the possibility of entrance to the Ikana region is available that we can see the full ending of this multi-character, multi-part quest. It also depends of time management, a core mechanic of the game. A side quest as important and integral to The Legend of Zelda: Majora’s Mask experience as the main dungeons. In fact it could be one of the centerpieces of the game and its core message; after all, the quest is at the heart of what Majoras Mask is trying to accomplish as a game, revealing layers upon layers from the characters, their relationships and getting to know their stories of misfortunes little by little for the more human-centric narrative displayed in the game. It connects marriage customs to the mask concept.
For the first time, we even get control of a character that is not Link; Kafei, a character that not only shares the control with the Hero of Time, but also his fate of being reverted to a child’s body, the loss of identity and being ostracized from the people he loves.
When we meet Anju, the owner of Clock Town’s Stock Pot Inn, she’s distraught. She’s supposed to get married in three days at the Carnival of Time, and her fiancé has just disappeared, probably even escaping with her best friend to add injury to insult. We soon learn that Kafei had a run-in with Skull Kid, who transformed his adult body into the body of a small child. To make matters worse, a thief has stolen his ceremonial wedding mask and he needs your help retrieving it before he can get married.
If you are successful in reuniting the two lovers, when you complete the game and defeat Majora, Anju and Kafei get married in Termina Field before all their friends and family. If you didn’t finish their quest, Kafei is still child-size. You see Anju from Kafei’s perspective, looking way up at his bride as they exchange vows. If you complete the quest, he’s grown to his adult self, now looking into each other’s eyes; but this time it’s eye-to-eye.
This long and demanding quest involves using the mail to send letters back and forth between the couple, finding and defeating the wedding mask thief, and personally attending their private vows exchange ceremony at the eve of apocalypse. Messing up a single step in the sequence means you must start over, and if you want all the items from the quest, you’ve got to do it at least twice. And yet the wedding is one of the sweetest stories in the game, even though (or perhaps because) it’s got nothing to do with saving the world.
This quest was mainly inspired by the developers attending a colleague’s wedding right in the middle of a threat of nuclear bombing; they said to each other “‘I can’t recall seeing a wedding portrayed in a game like this before. It would be really interesting if you had three days leading up to the wedding but there was this horrible cataclysm happening alongside it”. This game was a personal project for many developers since they put all kinds of experiences from their own lives into the game, giving the stories and dialogue a more realistic, grounded feel.
Musical Analysis
Structure: Section 1 / Section 2
Time Signature: 3/4
Tempo: 80 (ritardando to 60 at the end of Section 1, ritardando to 50 at the end of Section 2)
Melodic and Harmonic Profiles: G Ionian/Major
The music is a a truly earnest romantic theme of the sort that could have been made by a composer like Tchaikovsky, full of love but also the spiritual dimension of two soulmates encountering each other. One of those typical, superficially simple tune engraved with the Koji Kondo magic that makes pieces instantly nostalgic with just one listen. The calm before the storm in the case when we hear it atop the clock tower, floating in the air with bliss and then the sense of relief of true happiness mixed with a tinge of compromise and a little doses of hope. And at least Koji Kondo had the decency to not write a straight up parody of Tchaivkovsky’s love theme from Romeo and Juliet, its melodramatic tone already omnipresent in media and not at all appropriate for the tragedy-tinged moment at hand; two lovers reunited moments before the end of their lives.
That the music is proud and serene is an accomplishment and nobody would complain if it was used as an ending theme, its calming effect will contrast heavily with what comes next atop the clock tower, where we will realize that Majora is truly an entity on its own, the ultimate enemy, and the skull kid is just a puppet, with the music also changing abruptly. And on to the climax we go.
Without even looking the particular notes it’s already clear that the usual suspect for the Kondo nostalgia formula is already present; that’s right, the back and forth between the I and the IV chord on an Ionian/major mode, intersected by descending, offbeat harp figures like little hearts poring out of the characters and falling slowly to the floor in waltz time (seriously, for what scene was this composed originally?). The accompaniment goes something like:
G – C – G – G
Then on Section 2, it goes Zelda’s Lullaby on us by creating a descending bass harmony with a pedal note on top, forming the following harmony:
C – G – Am – G
C – G – Am – D
Of course with the appropriate romantic-era flavor of sevenths given by the interplay between the harp and the strings. This descending chord progression is similar to that of the Clock Town theme, Section 3.
The D chord prepares the loop to go back to the tonic G, which would be the natural ending of the piece if Koji decided to. This is what Princess Zelda’s theme could have sounded like had Kondo not decided to infuse it with elegant jazz sensibilities—or as it was on the original from A Link to the Past— Nevertheless, this is how a true piece of the romantic era is meant to sound. The harp here is the one giving the extended harmony to the piece; simply put, maj7 chords are synonymous with love and romance. The first C on Section 2 becomes a Cmaj7/9 and the A an Am7 with the fourth G a Gmaj7; we also get an Am7/9 and finally a D dominant 7 wanting passionately to go back to that G in full authentic cadence mode.
The full song is already there on the string section alone, Kondo just has to put on his orchestrator hat in order to fill spaces and enhance what is already there. The melody is after all just a set of four question-answer bocks. In typical basic melody writing fashion, the questions are stated and repeated while the answers provide variation, first going down, then moving up. It’s a very symmetric, very standardized melody (on Section 2 we can see nested question-answer blocks).
[ ( B D C E – F# D ) ( B D C E- F# Upper B ) ] —- { [ ( Upper B A Upper B A – D ) (G C G F#-B) ] [ (Upper B A Upper B A – D Upper D) (Upper D Upper D Upper C Upper C – Upper B Upper B A) ] }
Section 2 being more complex than Section 1 in order to provide variation between sections; make the two equally symmetric, the piece will suffer. A perfect balance between perfection and imperfection must be reached in any creative endeavor.
The choirs of course give the sacred nature to the piece and the horns fill the harmony playing sixths with sustained notes, receiving the landing of the 3/4 rhythm on an aural bed. During Section 2 the horns vary by now playing perfect intervals and thirds. Variation between sections in both arrangement and orchestration.
Truly an underrated theme from the series. It has similarities to the ending credits from A Link to the Past:
What does a climax for a game like The Legend of Zelda Majora’s Mask look like? Nobody would have ever guessed where Link is heading now; maybe you could have said that the final battle was going to take place inside the moon, but not in a million years anyone would conceptualize the region inside the moon to look like this, nor was any external indication from this enraged moon. Yet, inside we find a true paradise, a pure land for Link to gather his final thoughts, reflect and finish his transition into adulthood. The four stages of awakening have been completed, what’s left is to eliminate the ultimate obstacle towards enlightenment.

Help to keep the rites going around here by supporting the shrine:

Media Files, requests and support for more interactive content

Thou shall donate since this is a cult and you are now a sheep

Help staying awake analyzing game tracks and writing posts or else everything will end up being written by A.I
- Inside The Score – The Legend of Zeda: A Link to the Past – End Credits / Staff Roll
 The land rests As the last few minutes of this extensive journey that has now come to an end fly by, the nostalgia and reflective mood kicks in. Because such a massive enterprise as a Zelda game or a Lord of the Rings movie require multiple endings to convey everything… Read More »Inside The Score – The Legend of Zeda: A Link to the Past – End Credits / Staff Roll
 - Inside The Score – The Legend of Zelda: A Link to the Past – Ending / Epilogue ~ Beautiful HyruleFinal of the fantasy The Triforce has been touched. A wish has been granted. For the occasion, the newly undeceased king of Hyrule has commissioned a march in honor of the legendary hero to the Hylian Sousa, who might as well be composer Nobuo Uematsu since this piece is very… Read More »Inside The Score – The Legend of Zelda: A Link to the Past – Ending / Epilogue ~ Beautiful Hyrule
- Inside The Score – The Legend of Zelda: A Link to the Past – Triforce Chamber / Power of the GodsTake your boots off your feet And thus the Triforce spoke to men. And it became present in history. And you better treasure and contemplate this moment seldom witnessed in the course of the series. The elusive opportunity to interact and touch the most important artifact. You are now in… Read More »Inside The Score – The Legend of Zelda: A Link to the Past – Triforce Chamber / Power of the Gods
- Inside The Score – The Legend of Zelda: A Link to the Past – Ganon Battle / Prince of DarknessProgressive evil En Garde! And you better be prepared since you are about to duel the iconic enemy of the series at perhaps his canonically most powerful incarnation. Right after having touched the sacred Triforce which allowed him to conquer all of the Golden Land and whose evil and darkness… Read More »Inside The Score – The Legend of Zelda: A Link to the Past – Ganon Battle / Prince of Darkness
- Inside The Score – The Legend of Zelda: A Link to the Past – Boss Battle / Anger of the GuardiansQuick mayhem Ah, the simpler times when boss battles where not a multi epic orchestral suite but just an ostinato more basic that even what became the music for standard battle encounters out there. We are a long way from each boss having his own personalized track. And this early… Read More »Inside The Score – The Legend of Zelda: A Link to the Past – Boss Battle / Anger of the Guardians
- Inside The Score – The Legend of Zelda: A Link to the Past – Dark World Dungeon / Dungeon of ShadowsMemento mori We are getting closer to Ganondorf (or at least the wizard Agahnim who ultimately fulfills the same human side of evil role in this game) and that means getting closer to the profiles and motifs of his own theme song (which naturally was the theme of Agahnim at… Read More »Inside The Score – The Legend of Zelda: A Link to the Past – Dark World Dungeon / Dungeon of Shadows