Hope
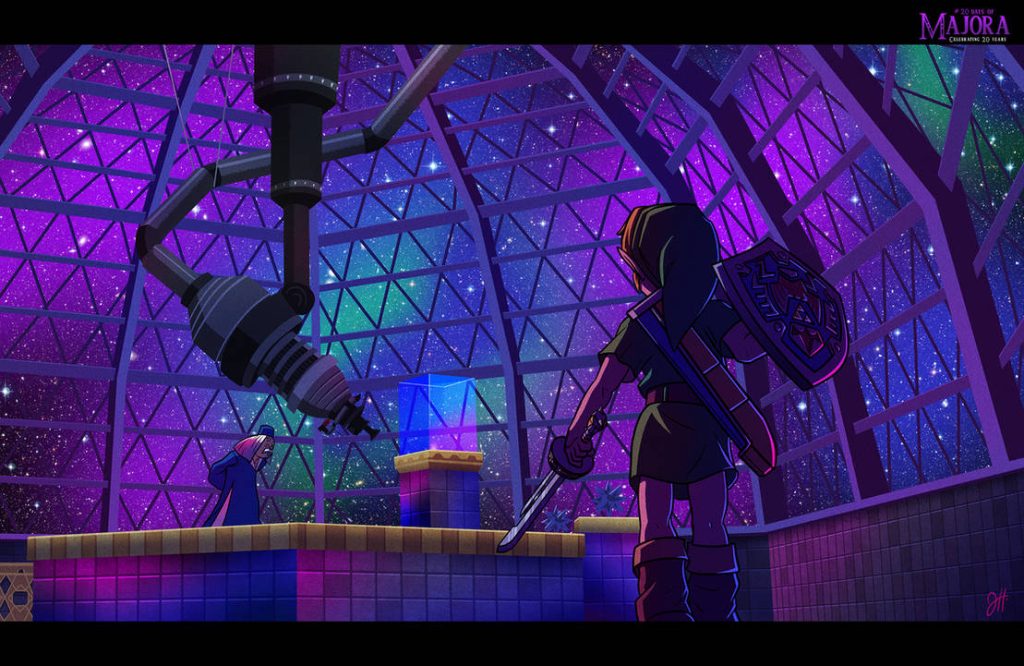
In the Astral Observatory Koji Kondo Presents us with the third and final interpretation of the word ‘acceptance’, showing us all the facets of a single emotion. There is acceptance at its more pure and honest sense, as heard inside the clock tower, then there is the acceptance of the Final Hours, an acceptance without any hope left, and finally, its counterpart; the Astral Observatory, a symbol of acceptance that shines a little ray of hope for what tomorrow will bring.
It’s in this observatory found at the outskirts of Termina, where Link manages to finally locate the mischievous skull kid that apparently wants to crash the moon into the world just for fun. The player can watch through the telescope how the mask is progressively taking control of its host throughout the three day cycle. The cries of a sentient moon revered by the people it has been set to destroy being the final key for Link to gain a chance to recover his own self.
This multicolor location is a small oasis amidst the apocalypse unfolding outside; gazing upon the skies and the stars was perhaps what allowed Termina to gain a deeper understanding of time, thus prospering and advancing as a society. So, this place is a pivotal location for both the game world and the narrative. The music of Koji Kondo captures the sense of wonder, ecstasy, magic and sacredness of the skies and the universe. A quintessential Kondo composition that perhaps combines all of his greatest strengths as a composer together in an aural collage that is rivaled only by the multicolor visuals, packing a density of dissimilar emotions into a short span of time.
The development team even made sure that the transition between the horrific ‘Cavern’ theme and the observatory was seamless and without a loading gap so that the sense of surprise was enhanced and the contrast more glaring.
Musical Analysis
Structure: Section 0 / Section 1 / Section 2 / Section 3
Time Signature: 4/4
Tempo: 90
Melodic and Harmonic Profiles: F Ionian/Major; F Lydian
Good sense of melody and effective voice leading (essentially the same thing) combine with sound design and the ability of mixing sad and happy emotions to form an encompassing overview of the core of Koji Kondo’s writing style, the one that always elicits nostalgia even from people who have never played the respective Nintendo game that the music originally comes from. There is melody found in so many places that a listener will jump from instrument to instrument without even knowing which is the main one; they all catch the attention and, at the same time, somehow are complemented with each other like puzzle pieces that fit together perfectly, managing to do this without making the theme feel cluttered or illogical.
The centerpiece of the piece and one the multiple options the listener can have the pleasure to focus on is the harpsichord that allows Kondo to create a brand new genre we could dub ‘space baroque’, mixing the ethereal, timeless notions of star gazing and outer space with the classical tradition. A style that years later would feel at home for games like Super Mario Galaxy (here we got a Rosalina’s Observatory style evolution of the piece in three parts). The piece fees longer than it is due to its long run of chords that never quite set on a pattern; they just go on and on till the end of the loop. By itself we can feel the baroque influences of the piece when hearing the harpsichord alone—specially when it escapes the nostalgia inducing I – IV cycle— The instrument being the trunk from where all the other branches can sprout.
At this core level the harmony progression starts to become apparent; it is presented here for reference but for Kondo harmony is melody, and the voice leading should be the main focus instead of any underlying harmony theory which is nothing but an emergent propriety of the melodic sensibilities of the composer.
F – Bb maj7 – F – Bb maj7 – Eb maj7 (#11) – Em 7/11 (b5) – A7 – Dm – G7- G7 – C7 sus4 – C7
The I – IV is always a shortcut to immediate bittersweet flavor, just two rounds of this movement will already cheat the nostalgia factor, a harmony movement that sounds outside any specific key due to it not having a leading tone, leaving the listener suspended on a timeless loop. Kondo is fond of this particular movement, as can also be heard on such pensive tracks as the ‘Title Theme’ from Ocarina of Time, the ‘File Select Menu’ from Super Mario 64 and the ‘End Credits’ from the same game. In similar fashion to how the perfect fourth interval blurred the lines between good and evil, the I – IV blurs the line between happy and sad.
Now the work is done; it is just a matter of engulfing this instrument with dreamy timbres to make it otherworldly. The heavenly choirs and the ethereal strings create a bed by maintaining mostly one note through the piece and moving slowly.
The song proves that density does not necessarily needs to be accomplished with a lot of instruments, the few instruments Koji uses all have their own space and resonate with each other to make it sound like there are a lot of timbres. Their notes were carefully selected and they use a similar sound palette to that of the ‘Clock Tower’ cue.
What we could call the melody consist entirely of a four note pedal motif repeated endlessly and changing colors depending of the underlying harmony. It represents the multicolor setting we are immersed in.
Just like the observatory itself, it is a kaleidoscopic soundscape where the listener can’t help but one moment focus on the harpsichord, the other on the chimes and after that on the piano (the harpsichord finishes its statement after the chimes, and the piano also sounds its proud low notes in the little space left between these two instruments). The same sensation of looking to everything that it’s on the sky but in musical form. Three melodies playing in perfect harmony just like the spheres in the sky. The concept known as Musica universalis presented by Koji Kondo.
A composition remarkable for how many different emotions it condenses into such a small amount of musical material. What’s more, the composer manages to do this without making the theme feel messy or nonsensical.
This is a short moment on the game that players don’t even have a reason to revisit again; yet, the developers still went all in. The Astral Observatory is the last remainder of hope for the adventure that is to come. Turns out, Link will be the only person in town to get the chance of seeing a new day.
As a fun fact, the professor from the observatory looks just like the titular master of the Jackie Chan film ‘Drunken Master (1978) and perhaps has drank a lot of Chateau Romani.

Help to keep the rites going around here by supporting the shrine:

Media Files, requests and support for more interactive content

Thou shall donate since this is a cult and you are now a sheep

Help staying awake analyzing game tracks and writing posts or else everything will end up being written by A.I
- Inside The Score – The Legend of Zeda: A Link to the Past – End Credits / Staff Roll
 The land rests As the last few minutes of this extensive journey that has now come to an end fly by, the nostalgia and reflective mood kicks in. Because such a massive enterprise as a Zelda game or a Lord of the Rings movie require multiple endings to convey everything… Read More »Inside The Score – The Legend of Zeda: A Link to the Past – End Credits / Staff Roll
 - Inside The Score – The Legend of Zelda: A Link to the Past – Ending / Epilogue ~ Beautiful HyruleFinal of the fantasy The Triforce has been touched. A wish has been granted. For the occasion, the newly undeceased king of Hyrule has commissioned a march in honor of the legendary hero to the Hylian Sousa, who might as well be composer Nobuo Uematsu since this piece is very… Read More »Inside The Score – The Legend of Zelda: A Link to the Past – Ending / Epilogue ~ Beautiful Hyrule
- Inside The Score – The Legend of Zelda: A Link to the Past – Triforce Chamber / Power of the GodsTake your boots off your feet And thus the Triforce spoke to men. And it became present in history. And you better treasure and contemplate this moment seldom witnessed in the course of the series. The elusive opportunity to interact and touch the most important artifact. You are now in… Read More »Inside The Score – The Legend of Zelda: A Link to the Past – Triforce Chamber / Power of the Gods
- Inside The Score – The Legend of Zelda: A Link to the Past – Ganon Battle / Prince of DarknessProgressive evil En Garde! And you better be prepared since you are about to duel the iconic enemy of the series at perhaps his canonically most powerful incarnation. Right after having touched the sacred Triforce which allowed him to conquer all of the Golden Land and whose evil and darkness… Read More »Inside The Score – The Legend of Zelda: A Link to the Past – Ganon Battle / Prince of Darkness
- Inside The Score – The Legend of Zelda: A Link to the Past – Boss Battle / Anger of the GuardiansQuick mayhem Ah, the simpler times when boss battles where not a multi epic orchestral suite but just an ostinato more basic that even what became the music for standard battle encounters out there. We are a long way from each boss having his own personalized track. And this early… Read More »Inside The Score – The Legend of Zelda: A Link to the Past – Boss Battle / Anger of the Guardians
- Inside The Score – The Legend of Zelda: A Link to the Past – Dark World Dungeon / Dungeon of ShadowsMemento mori We are getting closer to Ganondorf (or at least the wizard Agahnim who ultimately fulfills the same human side of evil role in this game) and that means getting closer to the profiles and motifs of his own theme song (which naturally was the theme of Agahnim at… Read More »Inside The Score – The Legend of Zelda: A Link to the Past – Dark World Dungeon / Dungeon of Shadows